
Quick Start
This guide walks you through connecting to a brand-new PrivateLAN appliance, logging in for the first time, and the recommended order to configure the system afterwards.
Connecting to the appliance for the first time
Before you can reach the appliance by name, your computer needs to be able to resolve PrivateLAN's hostnames. Add the following entries to your hosts file, pointing to the appliance's default LAN IP address 192.168.200.200:
| IP address | Hostname |
|---|---|
| 192.168.200.200 | app.privatelan.nl |
| 192.168.200.200 | radius.privatelan.nl |
| 192.168.200.200 | pki.privatelan.nl |
- Windows:
C:\Windows\System32\drivers\etc\hosts - Linux:
/etc/hosts
Make sure your computer's network adapter is on the same network as 192.168.200.200 (subnet mask 255.255.255.0), then open https://app.privatelan.nl in your browser.
If you later change the appliance's LAN IP address or hostname (see System Settings), update these hosts file entries to match the new address.
The first time you open the web interface, your browser warns that the connection is not private. That is expected: the appliance uses a certificate of its own, issued by a CA of its own, and your computer does not trust that CA yet. Continue to the site. Once you have logged in, you can download the appliance's CA under System > Security and install it as a trusted root certificate, or upload a certificate from your own CA there (see System Settings).
Logging in for the first time
Log in with the default administrator account:
| Field | Default value |
|---|---|
| Username | admin |
| Password | NotSecure |
For security reasons, PrivateLAN requires you to set a new password for this account immediately after your first login — you will not be able to access other pages until you do. See Users & Account Security for more on passwords and two-factor authentication.
When you change the default password, the appliance clears its audit log, syslog and dashboard trend lines, so you start with empty logs rather than with what was recorded while the appliance was being prepared. The audit log then opens with a single Logs cleared entry.
At the same moment the appliance creates its own keys: the update key that its licence is linked to, the keys it encrypts stored credentials with, the CA and certificate of its web interface (your browser warns once more, for the new certificate), and the CA of its RADIUS server for 802.1x. From then on it shares none of these keys with the image it was installed from or with any other appliance. They are kept on the data disk: include the data disk in your backups, because without these keys the stored credentials and user accounts in a database backup cannot be read back.
Recommended configuration order
Once you are logged in and have changed the default password, we recommend configuring PrivateLAN in the following order:
- Network settings — set the appliance's permanent IP address, hostname/FQDN, DNS, timeserver and timezone. See System Settings.
- License — activate your license so the correct limits and features become available. See Licenses.
- Users & security — add accounts for your colleagues and enable two-factor authentication. See Users & Account Security.
- Switches — register your switches and organize them into switch groups. See Switch Management.
- VLANs — create the VLANs your network needs and configure routing. See VLANs.
- 802.1x / RADIUS — register your switches as RADIUS clients and provision certificates if you want to use 802.1x port authentication. See 802.1x / RADIUS.
- Device groups & devices — create device groups, which link devices to a VLAN and security configuration, and register your devices. See Device Management.
- Deployment — prepare switch ports for automatic device rollout. See Device Deployment.
- Monitoring — once everything is configured, use the dashboard, reports and audit log to keep an eye on your network. See Monitoring & Reports.
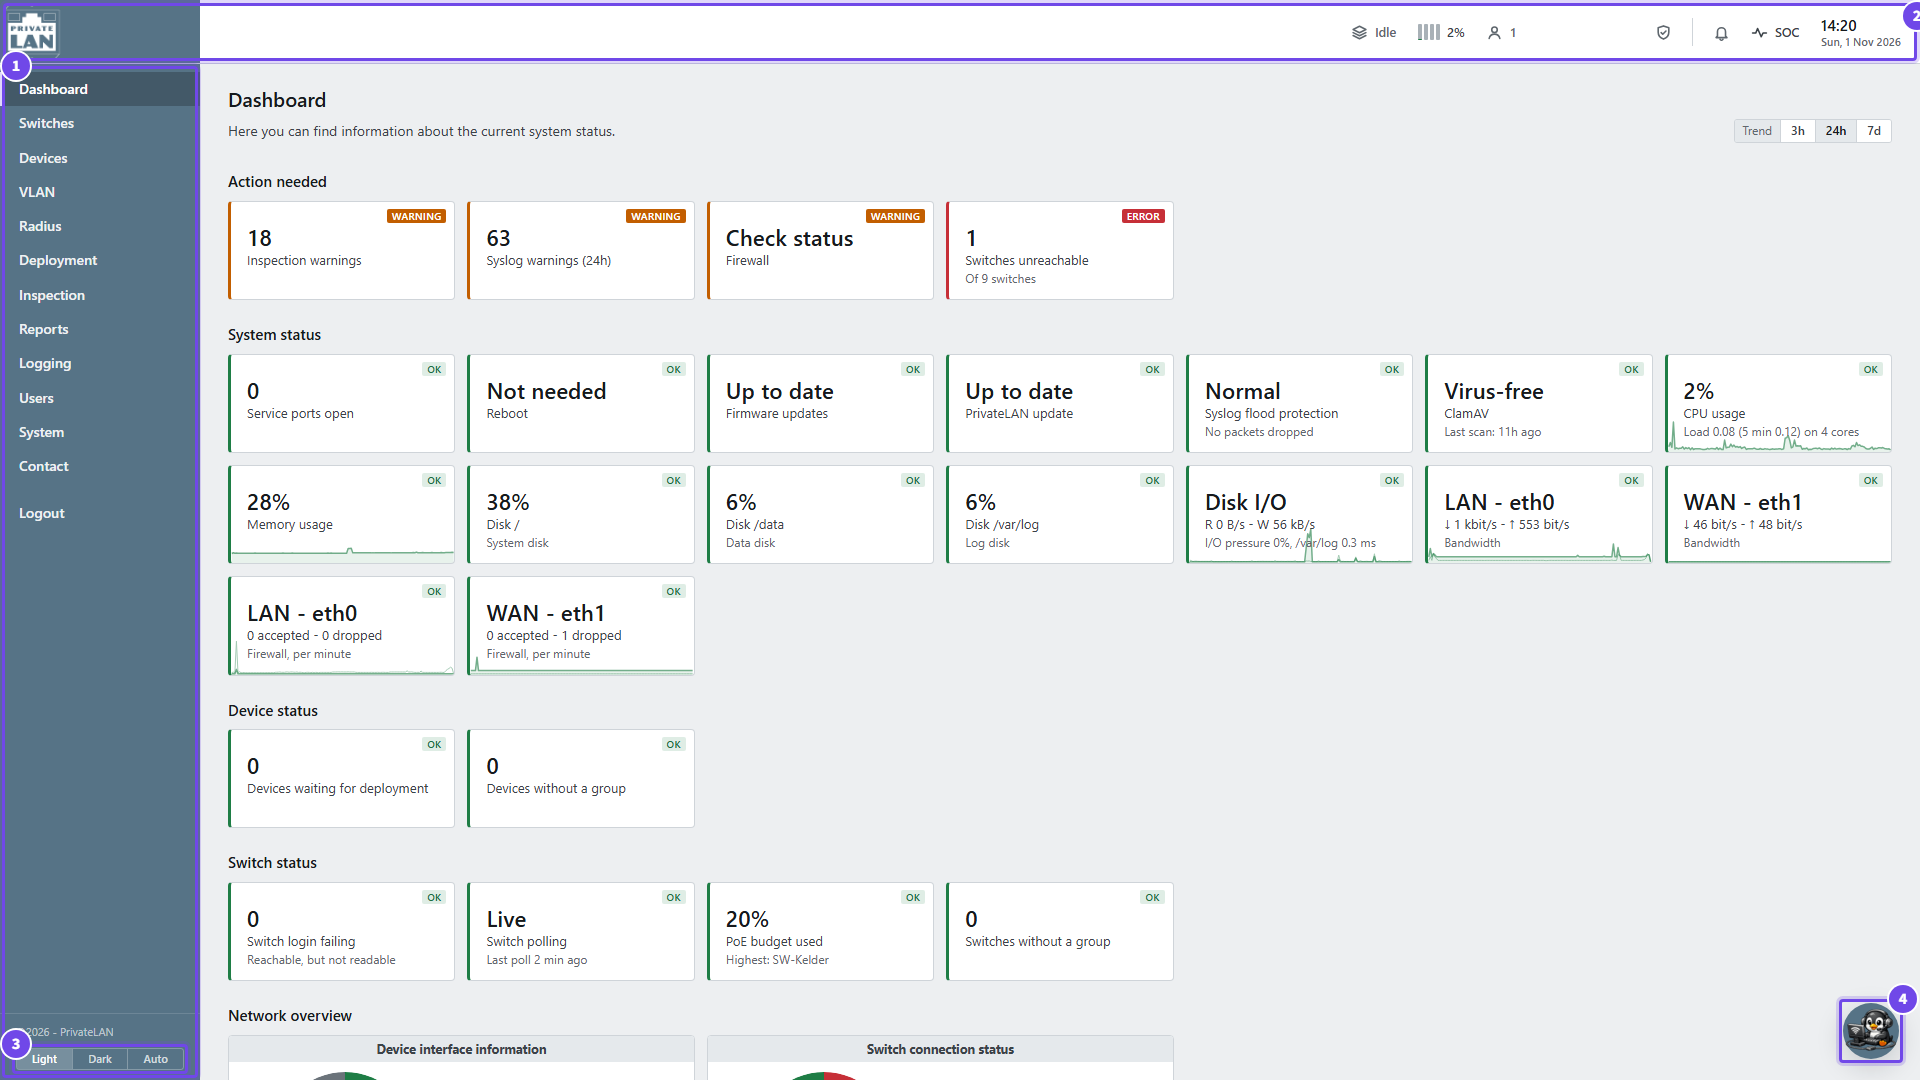
- Menu — every page of the appliance, grouped by subject
- Status bar — the state of the appliance at a glance, with the clock and the SOC button
- Light, Dark, Auto — the appearance of the web interface in this browser
- Tux — the assistant, on every page
Steps 4-8 build on each other: switches must be registered before VLANs can be programmed onto them, VLANs must exist before device groups can reference them, and device groups must exist before devices or deployment ports can use them.
